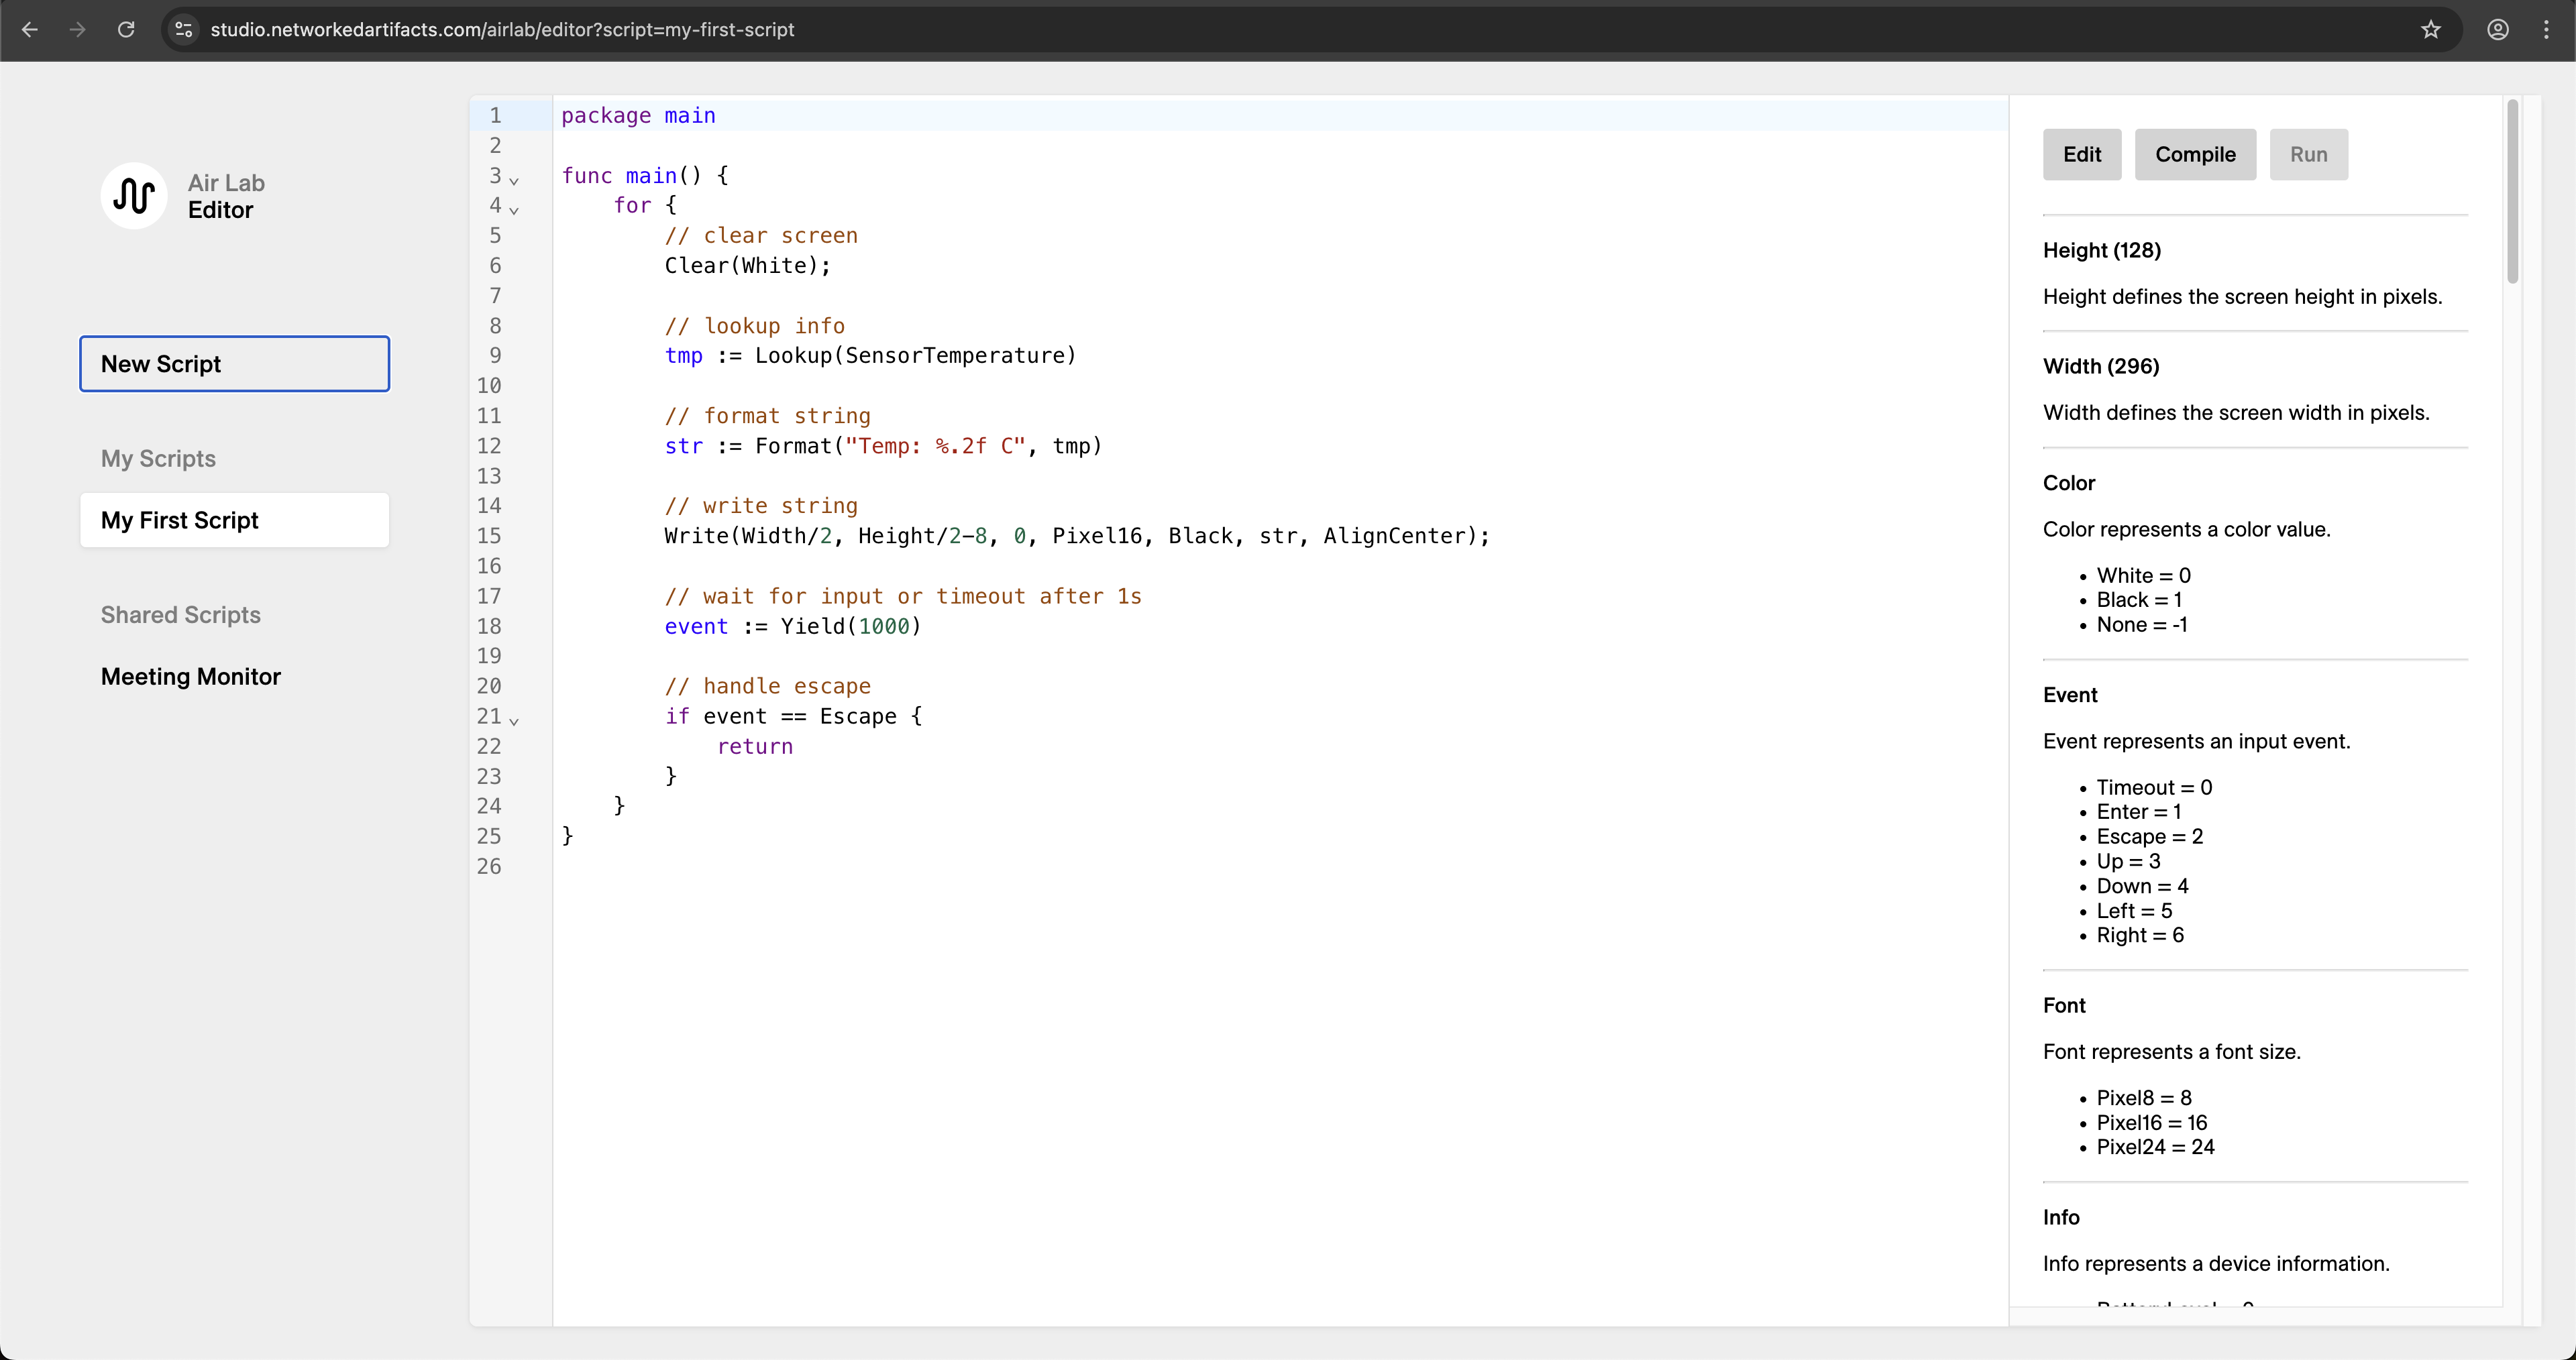
Script Editor
Script Editor is our web-based editor and compiler, allowing you to write plugins that run on your Air Lab, utilizing its sensors, screen and input buttons. Moreover, through the ports on the back, external sensors and other components can be connected.
Programming Language
Script Editor is based on Go (or Golang), a high-level C-like programming language. For complete documentation and syntax, please refer to The Go Programming Language Specification, or Go by Example for a hands-on introduction.
Documentation
Script Editor has built-in functions that allow quick access to its sensor and inputs, alongside drawing functions such as the Rect() or Line(), and the Beep() function to play sound through the built-in buzzer.
The full documentation can be found on the right-hand side of Script Editor.
Setup
Script Editor is part of Studio and can be accessed from the menu on the left side.
Each newly created script contains a template script with a few basic lines of code that, when compiled, display the current temperature. The steps below show how to create a new script and run the template code:
- Create a new script by clicking New Script on the left side.
- Give it a Title and Name. The title will appear in the editor and the device, while the name will be the unique URL of that script (therefore, it must be lowercase and without spaces).
- Leave it unpublished and click Create.
- On the right-hand side, click Compile.
- Then, upload your script by clicking Run.
- Connect your Air Lab (only needed once per session).
- Wait for the upload to finish.
The plugin should now be running and showing the current temperature.
In case the plugin didn't launch automatically, you can access it through the Lab and run it:
- Navigate to the Plugins program on Prof. Robin's computer.
- Press to enter.
- Locate your plugin from the list and run it by pressing again.

Template Script Dive
Let's break down the code inside of func main(), bit by bit:
package main

func main() {
    for {
        // clear screen
        Clear(White);

        // lookup info
        tmp := Lookup(SensorTemperature)

        // format string
        str := Format("Temp: %.2f C", tmp)

        // write string
        Write(Width/2, Height/2-8, 0, Pixel16, Black, str, AlignCenter);

        // wait for input or timeout after 1s
        event := Yield(1000)

        // handle escape
        if event == Escape {
            return
        }
    }
}
The logic of the script is wrapped by a for loop. In this loop, each line is executed one after the other, for as long as the plugin runs on Air Lab.
Clear(White)The Clear() function erases Air Lab's screen at the beginning of each iteration, in preparation for new graphics to be drawn in the next code lines. The Clear() function takes one color argument: White, Black, or None.
tmp := Lookup(SensorTemperature)The Lookup() function retrieves device information such as sensor readings, battery status, and storage data. It has one parameter, Info, which specifies what type of information to fetch. The full list of available arguments can be found under Info on the right-hand side of Script Editor. In this case, the function looks up the temperature using the argument SensorTemperature.
The result of the Lookup() function is stored in a variable named tmp. In Go, variables are declared using the syntax name := value, where name is the variable's name and value is the data assigned to it. The := operator both declares and initializes the variable in one step.
str := Format("Temp: %.2f C", tmp)This line formats the text using the Format() function and stores it in a variable. This function supports a limited set of format specifiers: %d, %x, %f, %.Nf, and %s. In this example, the string "Temp" is followed by %.2f, which formats the value as a floating-point number with two digits after the decimal point. The variable tmp provides the value that replaces the %.2f placeholder in the formatted string.
Write(Width/2, Height/2-8, 0, Pixel16, Black, str, AlignCenter)The Write() function draws the text on the screen. It has seven parameters:
- X, Y: Location on the screen in pixels. In this case we take the predefined system variable
Widthand divide it by 2 to render the text the middle of the screen on the X axis. TheHeightis divided by 2 minus 8 to render the text also in the middle on the Y axis. The figure 8 derives from the size of the font, which is 16 pixels tall. - Line Spacing: The amount of space in pixels between lines of text. In this case, it's set to 0 since there's only one line of text.
- Font: There are three available fonts,
Pixel8,Pixel16andPixel24. The figure refers to the height of the font in pixels. - Color: The text's color. Due to the nature of the E-Paper display, available arguments are
WhiteandBlack. - Text String: This is the text itself. In this case we pass the variable
strwhich contains the formatted text and temperature reading. - WriteFlags: Modify where the text aligns to. The two arguments are
AlignCenterandAlignRight.
Task: Change the
Yield()Timeout to 10000 and notice how the temperature updates only every 10 seconds.
event := Yield(1000)This line creates a variable that stores the input event returned by Yield(). The function takes a single argument, a timeout in milliseconds, during which the script pauses and yields control back to Air Lab's operating system.
If you omit the Yield() function, the script will run in an infinite loop without any pause, which can lead to high CPU usage and unresponsiveness. By including Yield(), you allow Air Lab to manage resources effectively and respond to user inputs.
if event == Escape {
    return
}
This bit checks whether the variable event equals the predefined input constant Escape (a press on the button of Air Lab) if so, the function stops executing and returns, effectively exiting the plugin.
The full lists of the predefined input constants can be found in the documentation, under Event.
Physical Computing
Additional sensors and other components can be connected through Air Lab's extension ports, either via I2C or via the 2 GPIOs (General-purpose input/output).
The GPIOs can be configured as analog, PWM, or digital I/O, using the pin configuration functions:
GPIOConfig()– Sets the specified pin as digital input or output.AnalogConfig()– Sets the specified pin as analog input.PWMConfig()– Sets the specified pin for PWM output.