Device Overview
Learn about the first steps to take with your new Air Lab. From turning it on to calibrating the sensors, navigating the screens, and adjusting the device settings.
Turning On
Your new Air Lab arrives in shipping mode, which keeps the battery disconnected to prevent discharge during storage and shipping. You'll need to connect it to a power source once to wake it up.
Tip: To store your Air Lab long-term and keep the battery charged, re-enter shipping mode from the Developer program.
To exit shipping mode:
- Connect your Air Lab with a USB-C cable to a computer or USB charger.
- Press the button to start the device.
- Follow the instructions on the screen to adjust the date and time.
At other times, your Air Lab may just be powered off. In this case you can skip the USB-C connection step and directly press the button to start the device. However, if the device doesn't start, the battery may be discharged. In this case, let your Air Lab charge for a couple of minutes and try again.
Calibration
Tip: A weekly outdoor calibration is recommended if your Air Lab is used in closed rooms that are not regularly exposed to fresh air (like cellars or garages).
After turning it on, take your Air Lab outdoors for a minute to recalibrate the sensors. You can skip this step, but then the sensor readings might be slightly off due to an old or default reference point.
The Lab
The Lab is your home screen—the central hub from which you access all features and to which you return to when exiting menus and programs. Prof. Robin will host you here and comment on the current air quality.
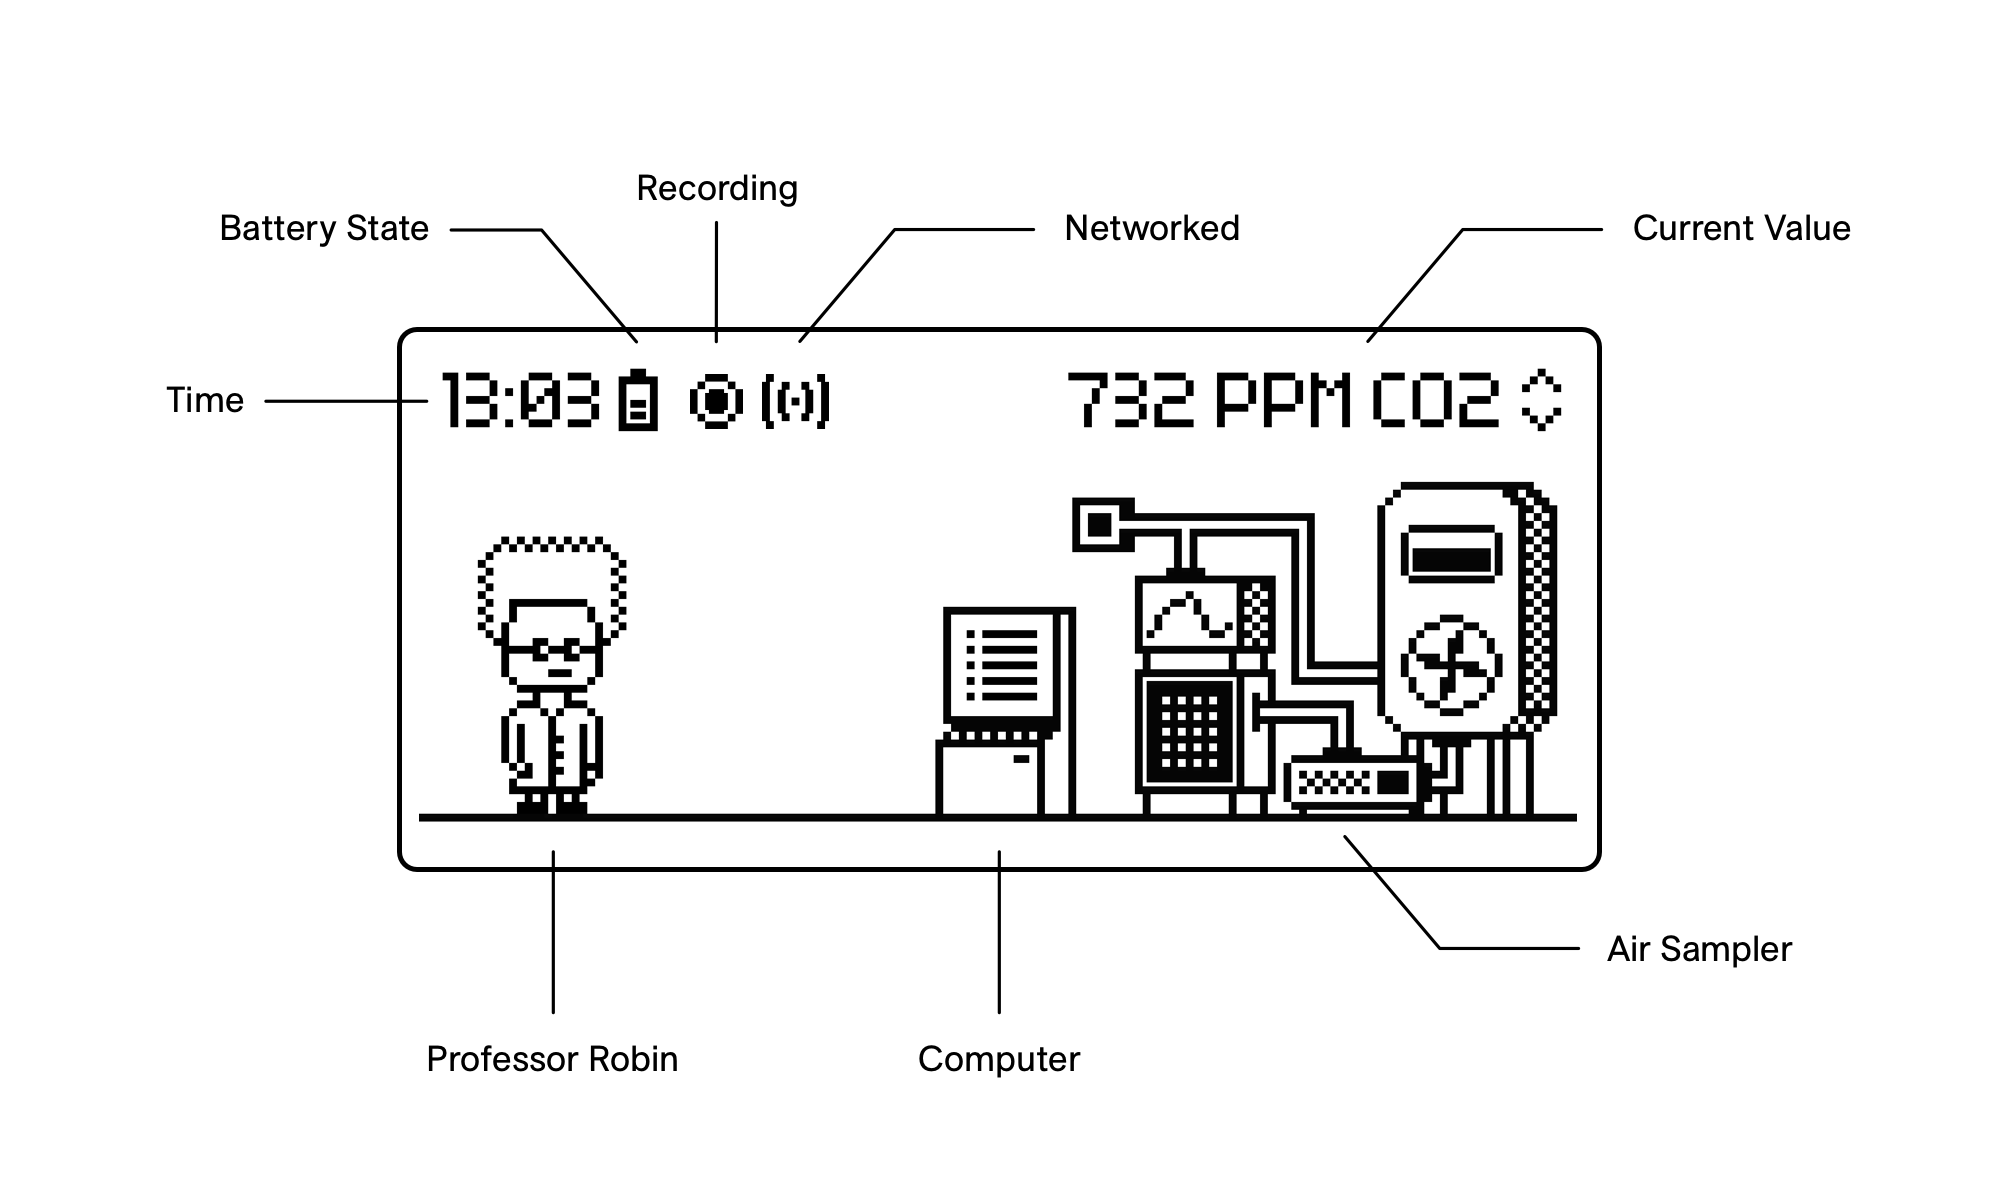
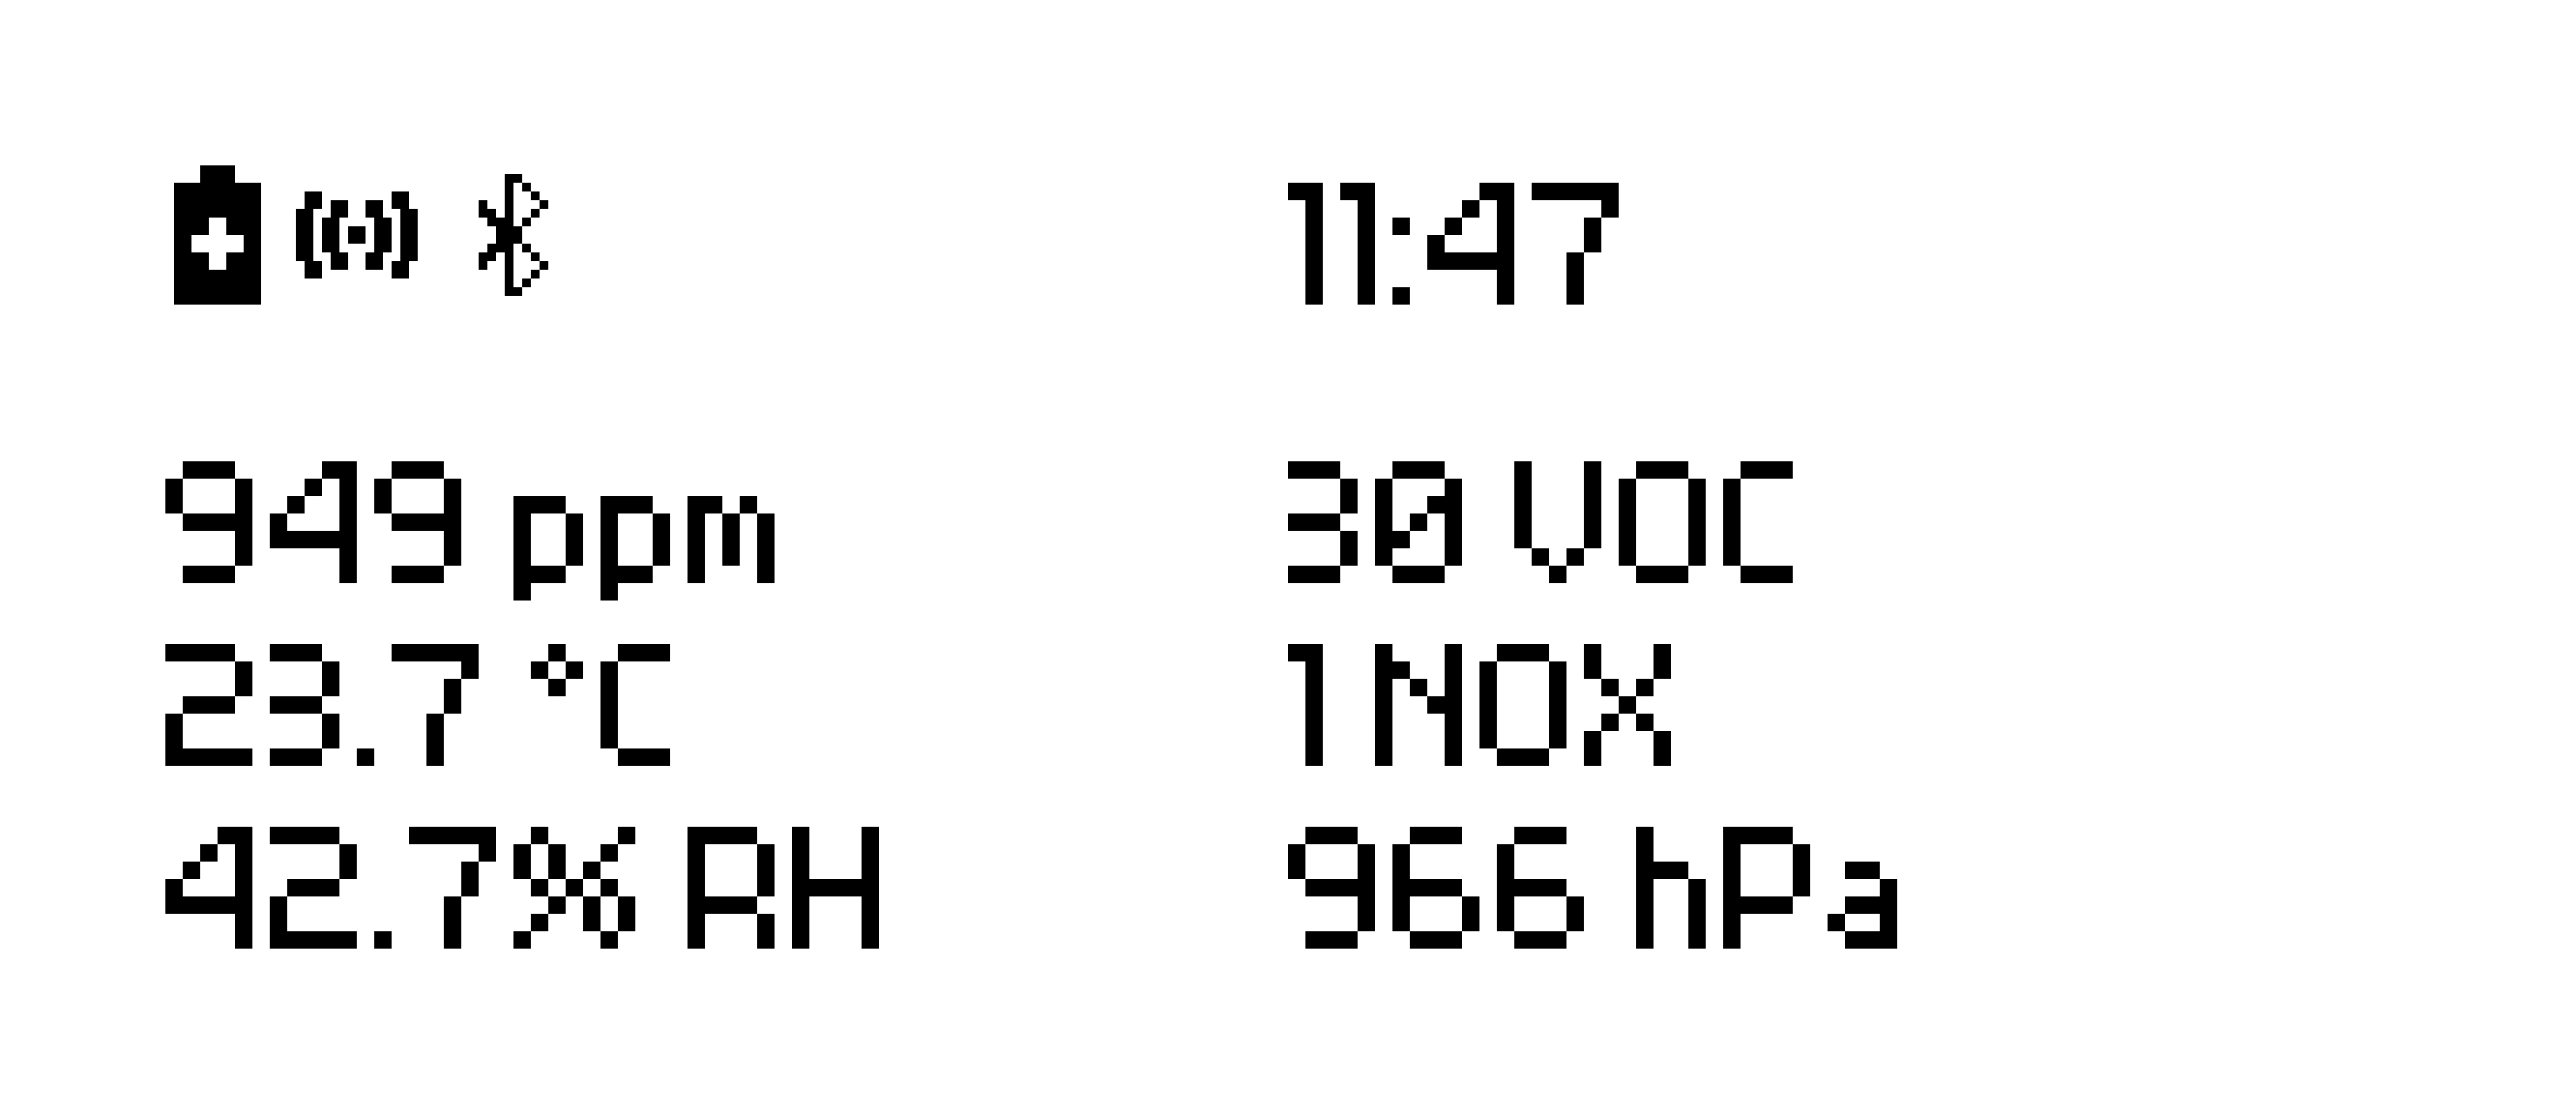
At the top of the screen is the status bar that shows essential information such as the current time, followed by an indication of the battery state. If there's an active measurement, the icon appears next to it. The icon indicates an active Bluetooth connection, while the icon confirms that an MQTT connection has been established. A quick overview of the current air measurement can be viewed in the top right corner of the status bar.
Below the status bar are Prof. Robin and his air quality sampler. On the computer, you can find the different Air Lab programs. These programs enable you to view and analyze measurements, connect through multiple communication protocols, configure device settings and more.
Note: While recording a measurement, becomes Active Measurement, and the program icon changes to .
| Icon | Program | Function |
|---|---|---|
| Live View | View real-time air quality data. | |
| Measurement | Record and analyze air quality measurements. | |
| Settings | View and modify device settings. | |
| USB Mode | Connect to device via USB. | |
| Bluetooth Mode | Connect to device via Bluetooth. | |
| Plugins | Run custom programs and extensions. | |
| Developer Mode | Advanced configuration and debugging. |
Navigation
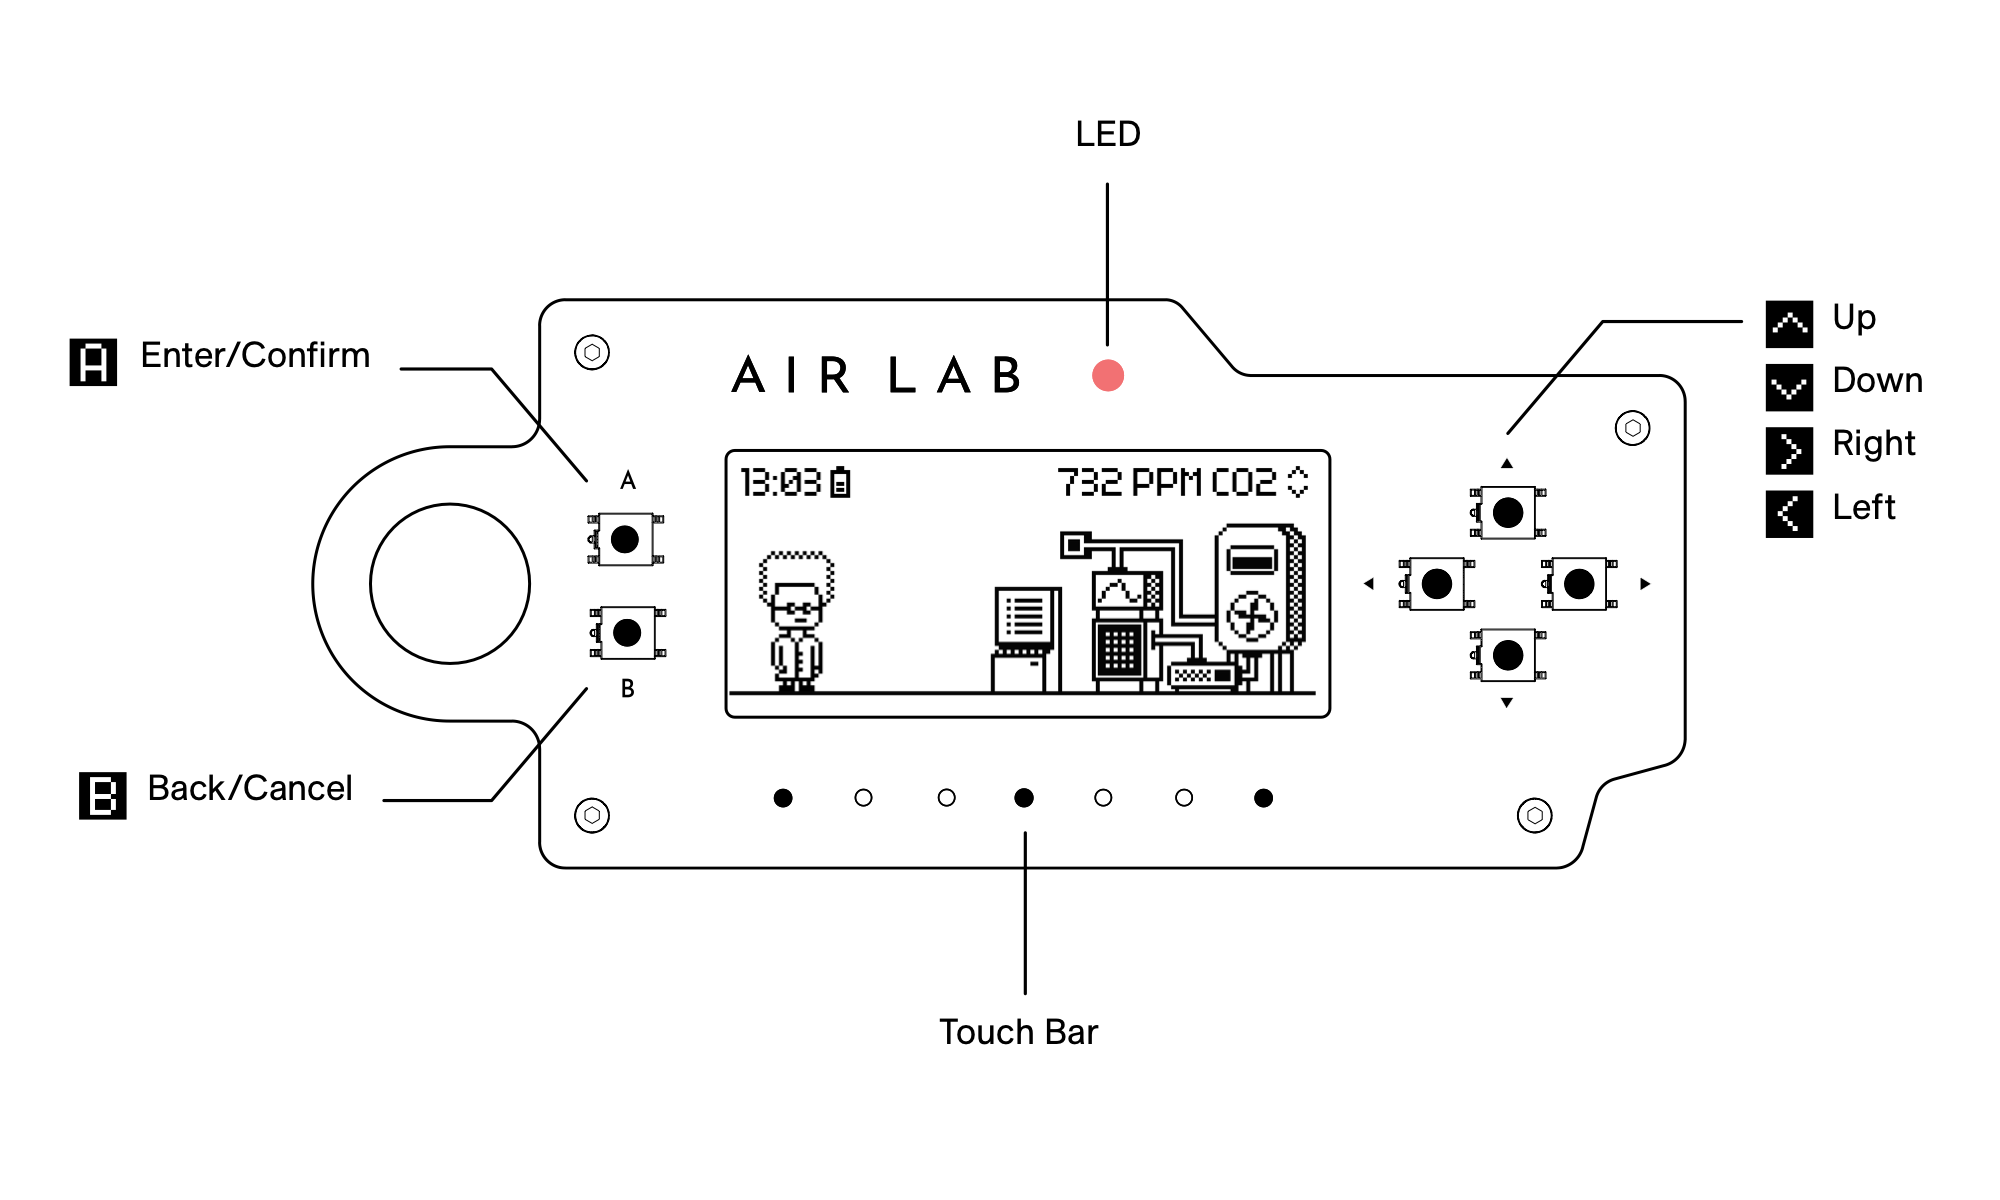
The arrow buttons are used to navigate through the Lab. and are your action buttons. Use to enter or confirm, and to cancel or escape. Hold any button to repeat the action continuously. Try it out:
- Change the sensor data displayed in the top right corner of your Air Lab by pressing .
- Use to move through the different programs, and notice how the icon changes on Prof. Robin's computer.
- Press to enter your preferred program and to go back to the Lab.
The Scroll Bar, situated at the bottom of your Air Lab, allows you to scroll through lists and graphs:
- Use the buttons to navigate the computer, until you reach Live View .
- Press to enter.
- On the Scroll Bar, swipe with your finger to move the cursor through the samples and read the value at its location.
The Scroll Bar can also be used to navigate lists inside some programs.
After 15 seconds of inactivity or when coming back to the Lab, Prof. Robin will tell you about the current air quality, such as "All good, air quality is fine!" or "Ugh, the air is full of fumes!" when, for example, VOC levels are higher than usual.
Idle Screen
After 30 seconds of inactivity, your Air Lab enters the sleep state to conserve battery. The idle screen shows the current time and air quality readings at a glance.
The device wakes when you press any button or pick it up. You can also enter the idle screen manually by pressing from the Lab.
The display performs a full refresh every ~60 sensor updates (~5 minutes at the default rate) to prevent ghosting. This is automatic and may cause a brief flicker.
Battery
Your Air Lab displays a low battery warning when the charge is running low. If the battery reaches a critical level while not charging, the device shuts down automatically to protect the battery.
Settings
The Settings program is where you can view device information, adjust configuration, and power off. See Configuration for a full guide to all available options.
Indicator
Air Lab features an RGB LED on the front that indicates device status at a glance:
| Color | Pattern | Meaning |
|---|---|---|
| Off | Normal operation | |
| White | Pulse | USB connected, and charging |
| White | Constant | USB connected, not charging |
| Blue | Pulse | Processing |
| Blue | Constant | Dialog or prompt active |
| Red | Pulse | CO₂ elevated (1000–1500 ppm) |
| Red | Constant | CO₂ critical (above 1500 ppm) |
The CO₂ indicators can be disabled via CO₂ Light in Settings → Configuration. When disabled, the LED only shows power and charging status.
Back to Top