Home Assistant
Follow this tutorial to connect your Air Lab with your Home Assistant setup.
Overview
The Home Assistant project was started more than 10 years ago to provide an open-source platform for home automation. Today many proprietary and open smart home devices can be connected to Home Assistant to read out their data or control them.
Many people deploy Home Assistant to a Raspberry Pi, which is a perfect host for such software. With the official Raspberry Pi Imager it's straightforward to prepare an SD-Card with a full installation of Home Assistant ready to be set up. If you don't have a Raspberry Pi, check out their website for alternative installation options on your computer or in the cloud.

Follow these steps to set up Home Assistant
- Download the Raspberry Pi Imager application.
- Burn a microSD card using the Home Assistant Image found under Other specific-purpose OS > Home assistants and home automation > Home Assistant.
- Plug the microSD card into your Raspberry Pi, connect Ethernet, and connect power.
- Once the initial boot is done, the IP address should be printed on the screen.
- Go to
http://IP_ADDRESS:8123to open the web interface. - Follow the initial setup steps to configure your Home Assistant installation.
MQTT Integration
Home Assistant supports multiple standards and protocols to integrate products with its system. While some are native/custom integrations written in Python, it also supports connecting devices with buses/bridges for Matter, Bluetooth, Zigbee, MQTT, and other protocols. For our initial integration with Air Lab, we decided to go with MQTT because it's lightweight and well-supported. We might explore more "native" ways of integration in the future.
The MQTT protocol is a widely supported IoT protocol based on the standard TCP/IP network stack. To get communication going, it requires a "broker" to act as an intermediary to relay messages between clients. This architecture is powerful and allows you to listen for Air Lab sensor data from multiple applications at the same time. The Mosquitto MQTT broker is a widely used open-source broker that is also available for Home Assistant as an add-on.
Note: If you want to learn about MQTT in general, check out the Wi-Fi & MQTT page.
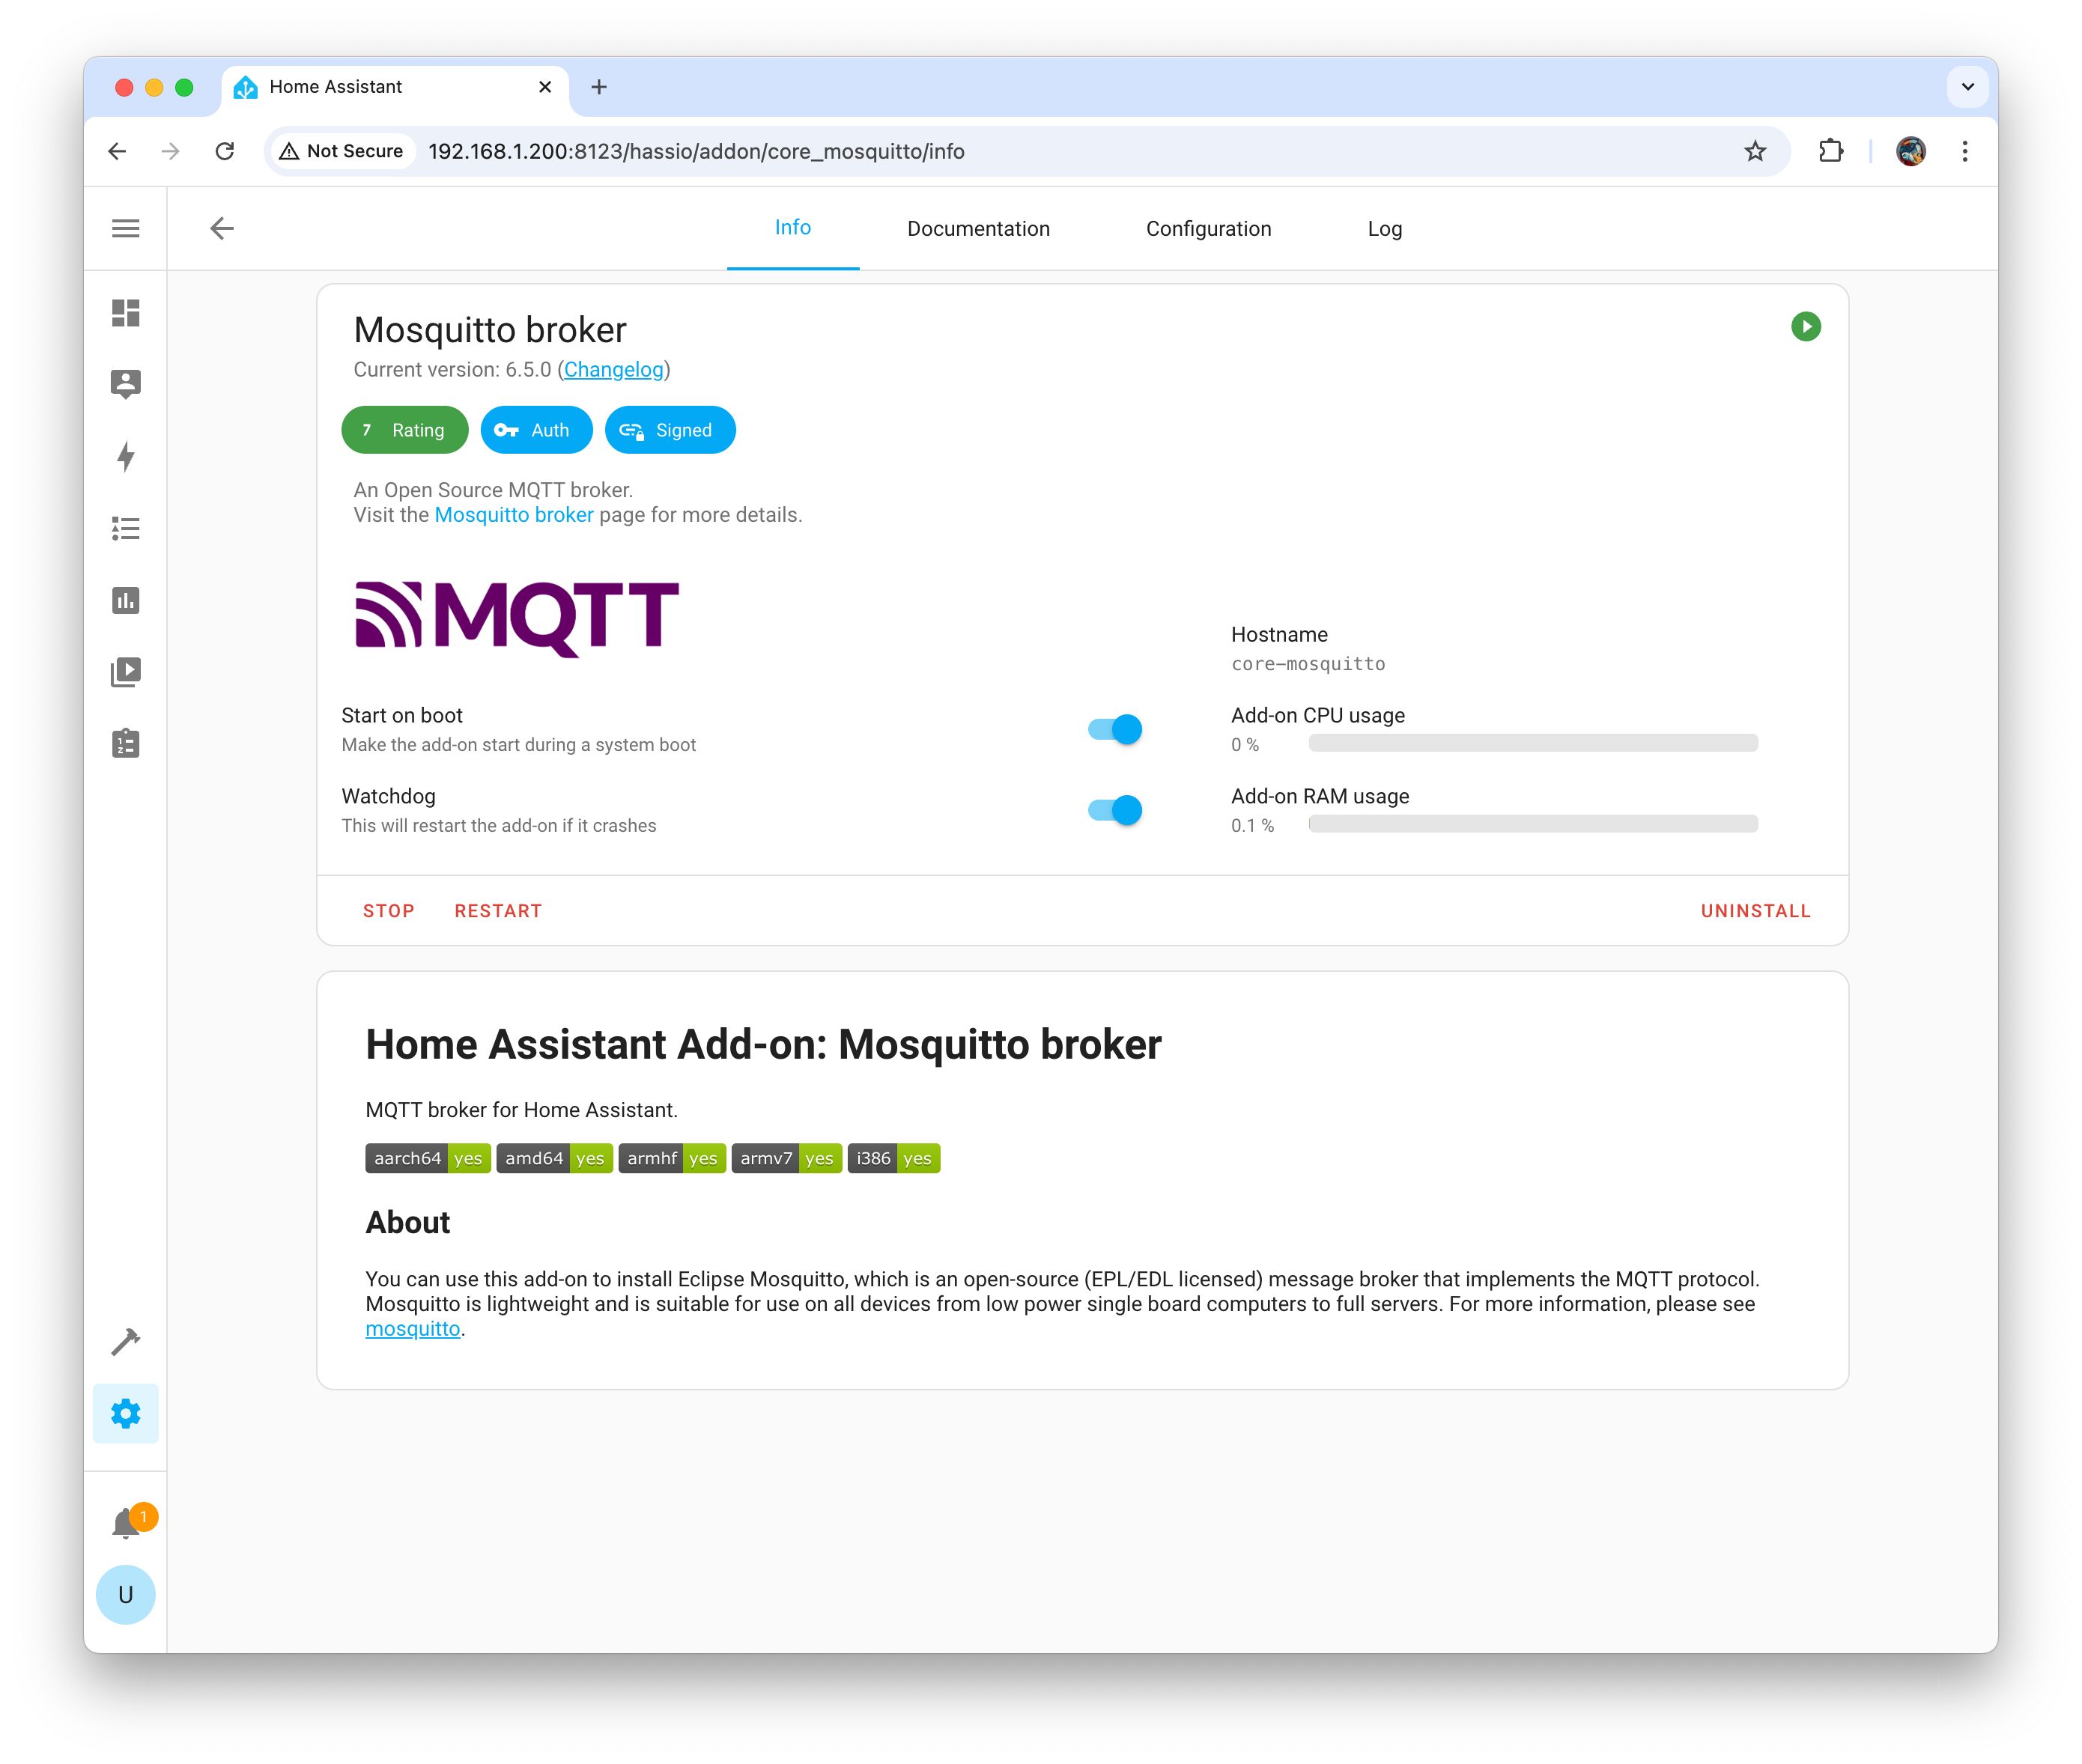
Follow these steps to install the Mosquitto Add-on
- Go to Settings, then Add-ons and click on the link to the add-on store.
- Search for MQTT in the search bar at the top, select Mosquitto broker and click Install.
- Once the add-on is installed, click Start to have Home Assistant run it in the background.
- We also recommend enabling the Start on Boot and Watchdog options to ensure Mosquitto is always running.
Air Lab Configuration
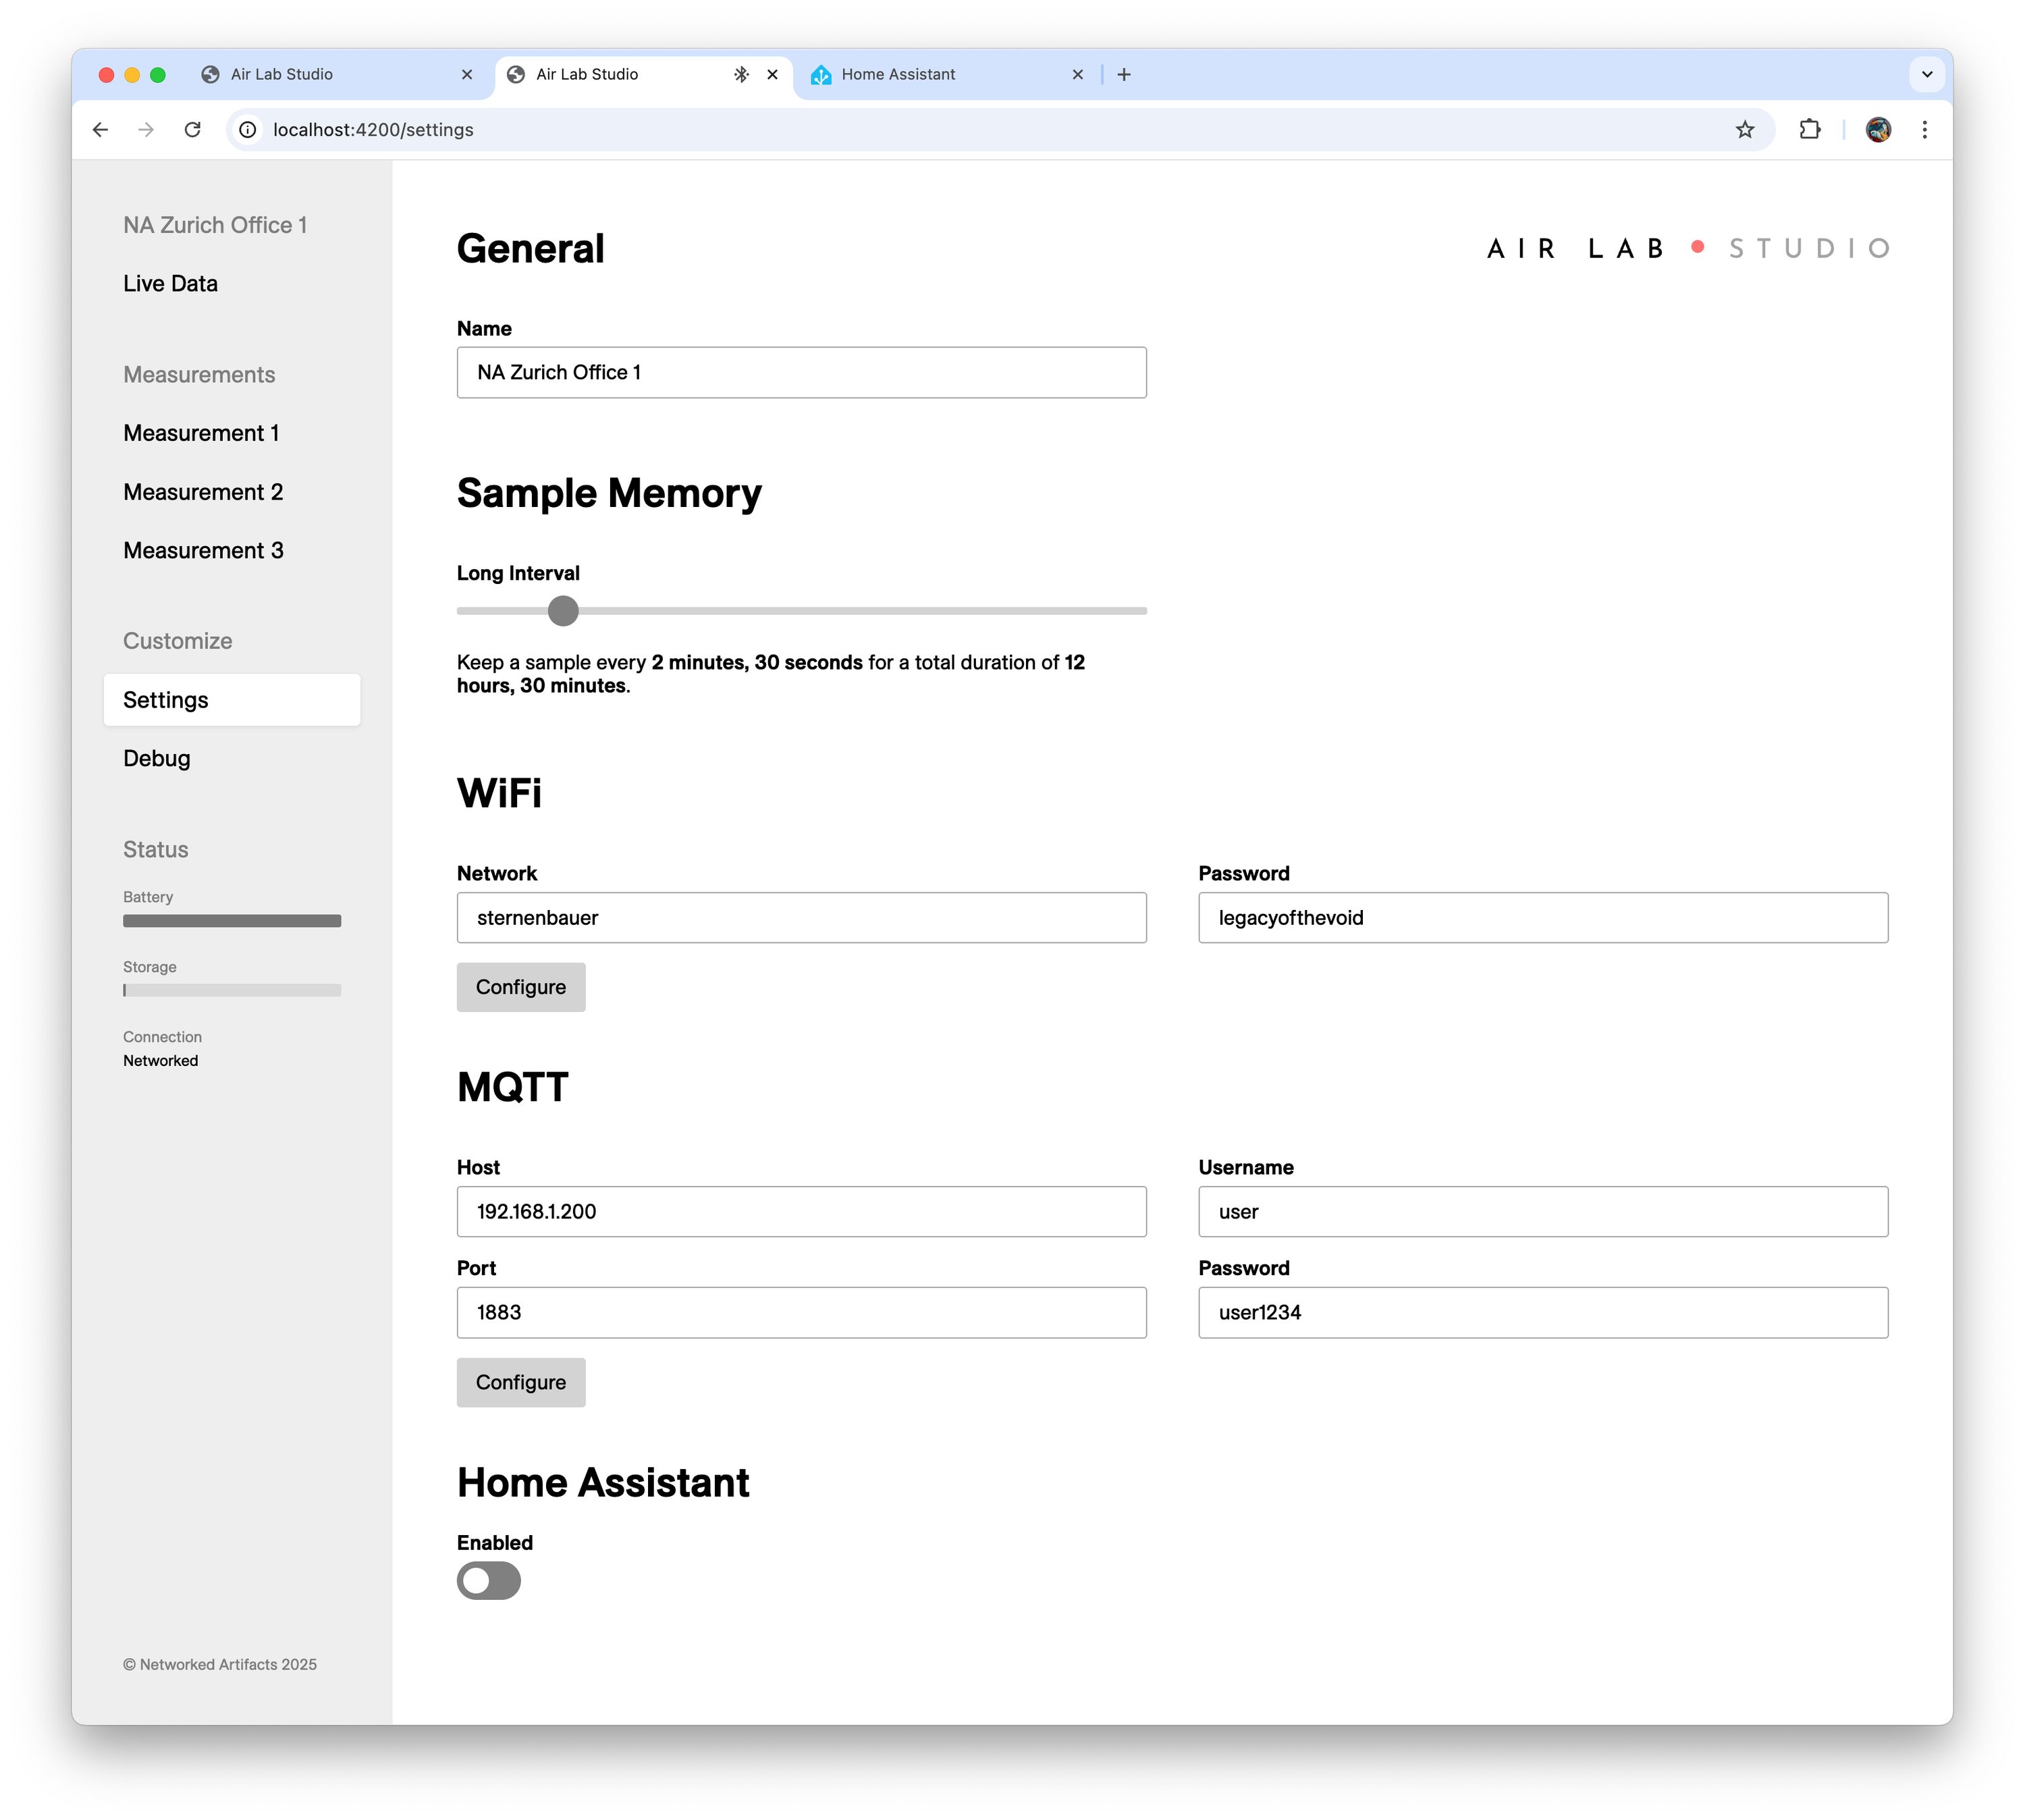
To connect your Air Lab with the Mosquitto Broker and, in turn, with Home Assistant, we need to configure the Wi-Fi network and MQTT credentials. To do so, we'll use Air Lab Console, our web-based interface, to access your Air Lab and configure it.
Follow these steps to configure your Air Lab
- Make sure your Air Lab is plugged in to prevent it from automatically sleeping.
- Go to Air Lab Console in a Chrome-based browser that supports Bluetooth.
- Click "Connect" and select your device from the appeared drop-down.
- In the sidebar, navigate to Settings.
- Enter your SSID and password in the Wi-Fi section and click Configure.
Under the "MQTT" section
- Enter the IP address of Home Assistant as the Host.
- Ensure the Port is set to 1883.
- Enter your previously chosen username/password for Home Assistant as Username and Password.
- Finally, click Configure to apply the settings.
If everything is correct, the Wi-Fi/MQTT Status in the sidebar should change to Networked. If it remains Disconnected check the Wi-Fi settings, and if it's just Connected, check the MQTT settings.
- Finally, activate the Enabled checkbox under the Home Assistant section to enable the Home Assistant auto-discovery mechanism.
Final Steps
Home Assistant will automatically detect the device and add its entities to the system. You can now add the sensor values to your dashboard and configure automations that use the data as triggers or conditions.
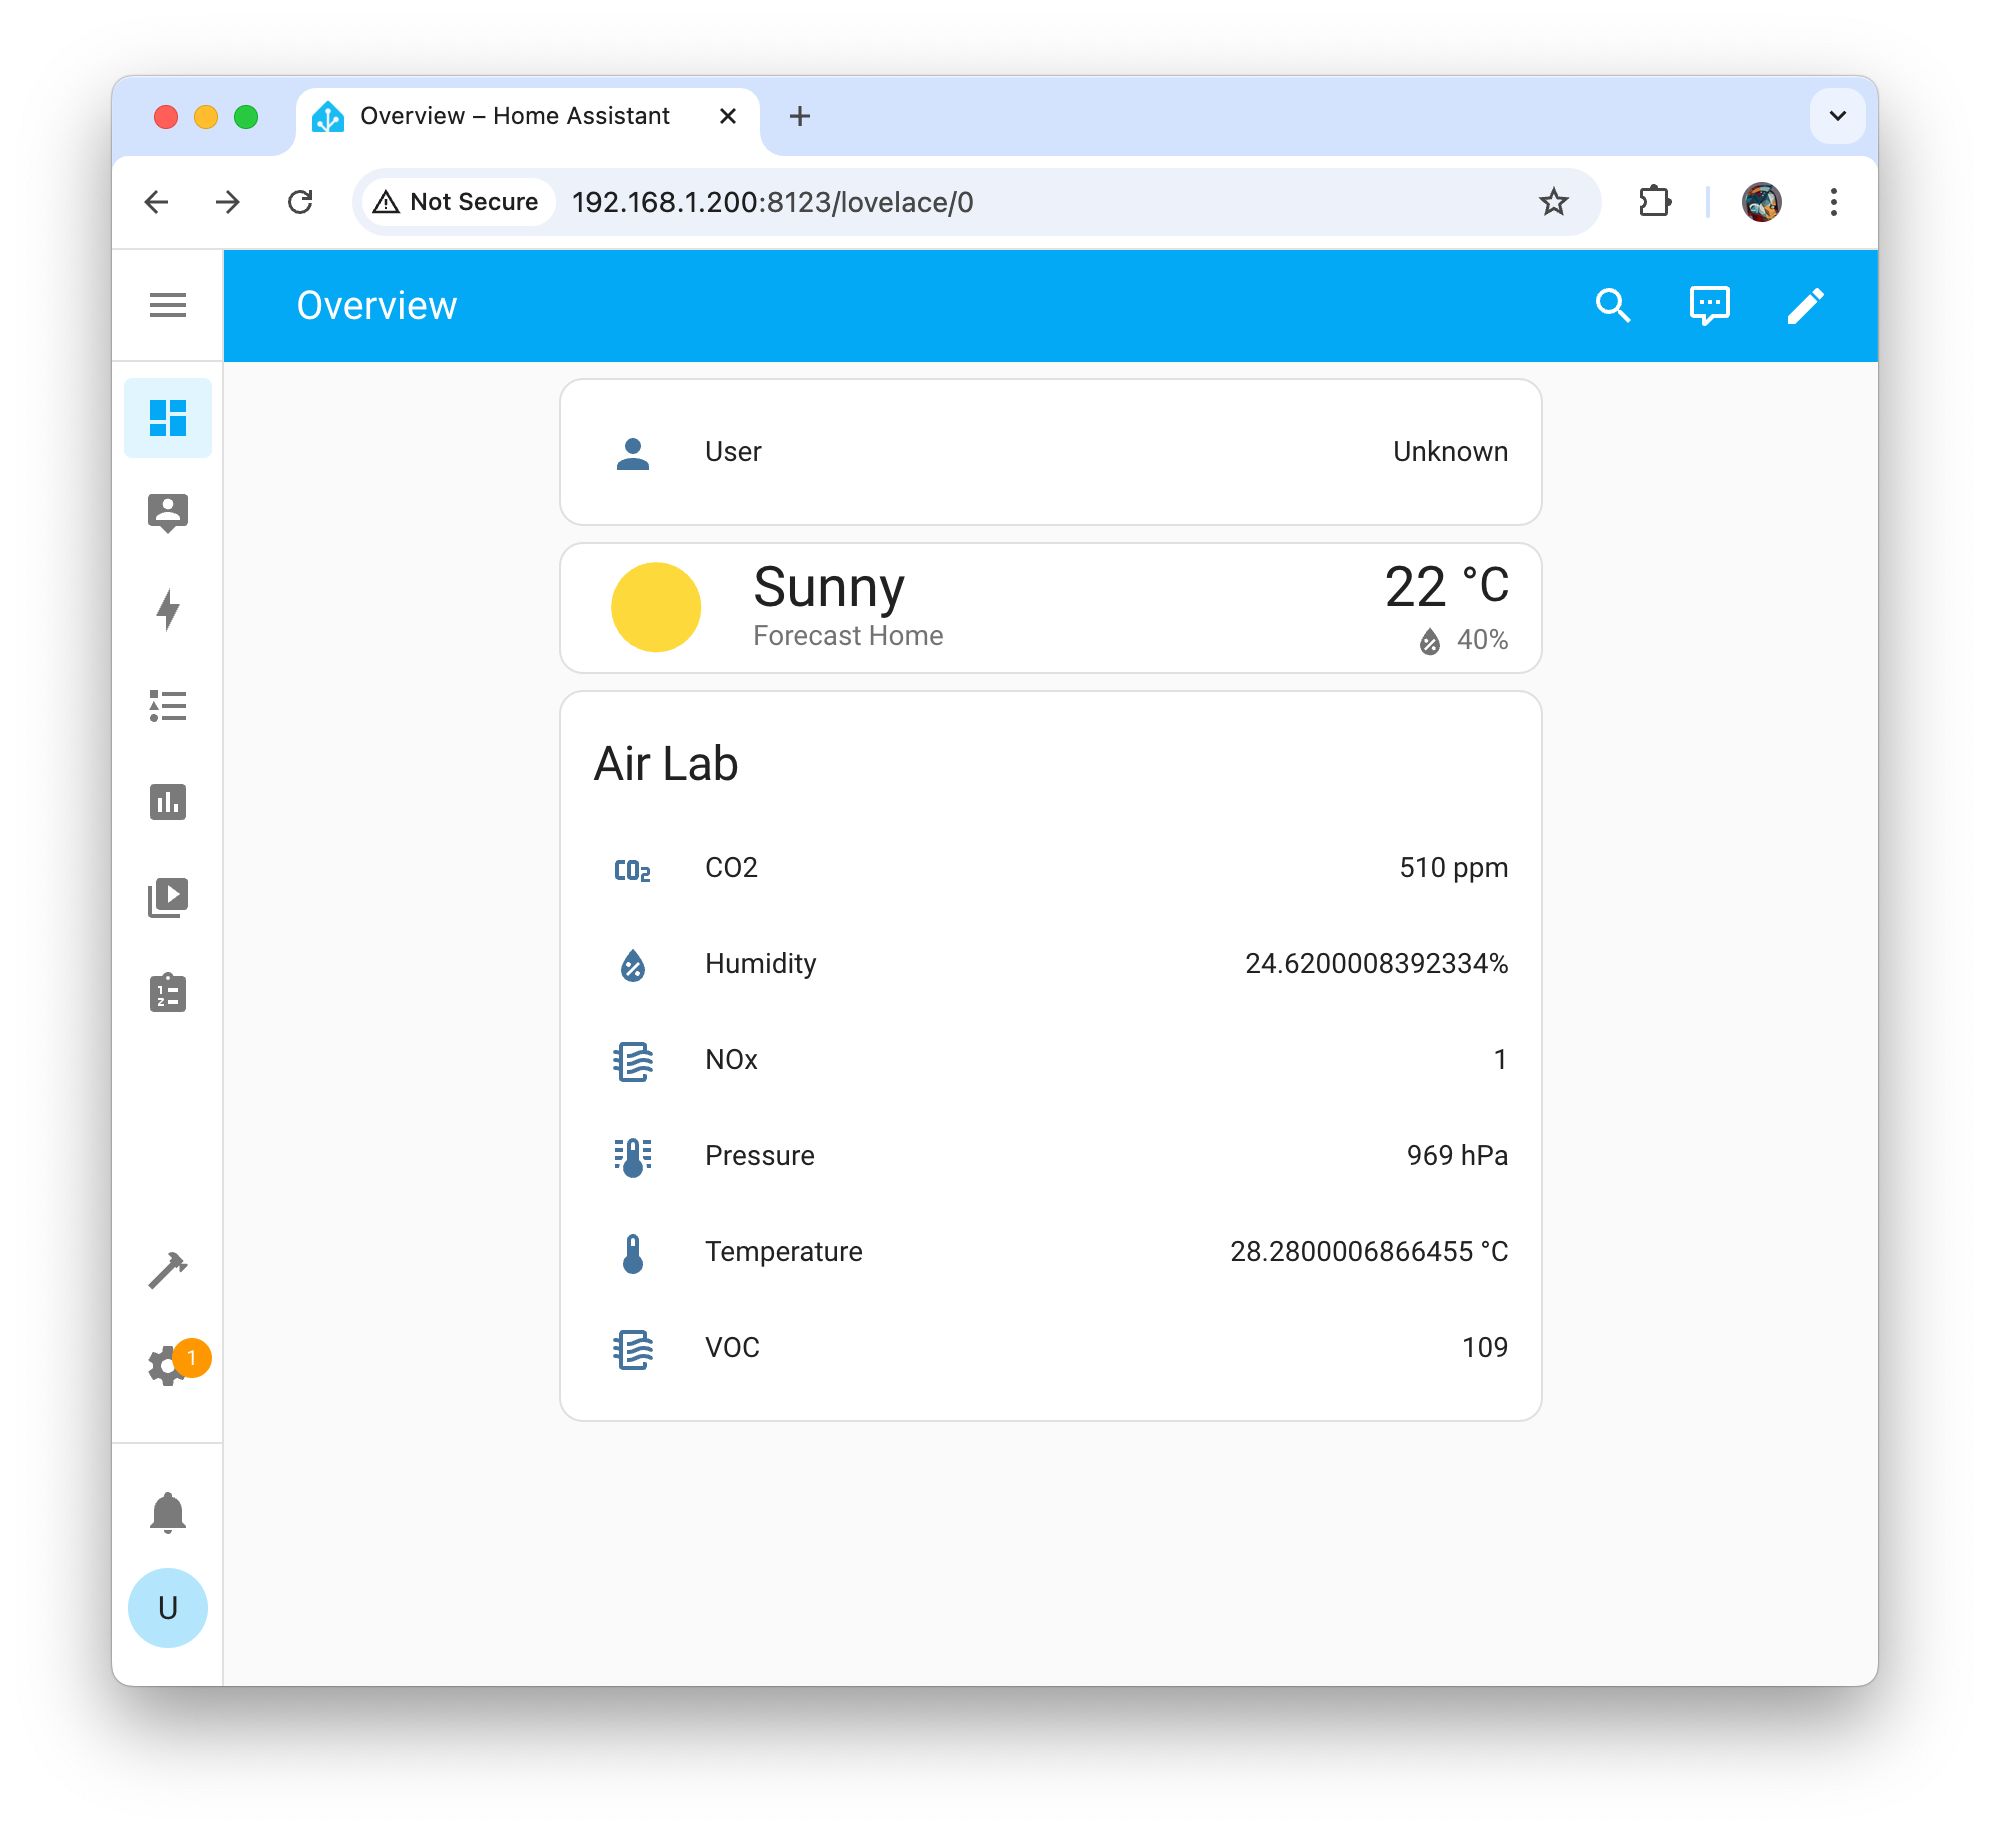
Entities
In addition to the six air quality parameters, Air Lab exposes the following entities via MQTT discovery:
- Battery (sensor,
bat): Battery level as 0–100%. - USB (binary sensor,
usb): ON when USB is connected. - Charging (binary sensor,
chg): ON when actively charging.
These appear automatically in the Home Assistant device dashboard alongside the air quality sensors.
Back to Top